Mountain Bikes
There’s all kinds with all kinds of intentions, capabilities, and budgets. They also have a super wide array of possible parts and tech. Here’s a nerdy little guide to help you figure out what it all means.
Ideal MTB tech for Oki trails:
Mountain bikes have come a long way in technology, capability, and what riders demand from their bikes. Here are some of the nice things you may want going on on your bike if you want to pursue confident performance on Okinawa’s wildest trails.

Frame
We’ve all learned from Gran Tourismo that most cars can be taken to incredible levels of performance. Bikes are kind of like that, but there are four things that matter.
1. Material. Aluminum is probably the most common material. It’s light, strong, and more likely to deform before catastrophically failing. Carbon fiber is lighter (usually), potentially stronger, but a complete nightmare when it fails. Like they work well underwater to a certain depth. Steel is an ancient material that we can generalize as being heavy and strong. Yes, all materials can be strong. Bikes are expensive because there’s a lot of engineering and tuning going into designing these frames, whatever the material is. Unless it’s a Surly. And in that design process they can decide where they want the bike to be flexy, where to be stiff, where to be braced, so frames that are similar on paper can ride very different.
2. Size. Kind of an obvious one, but also the detail that’s never effectively conveyed on Facebook marketplace. It also get’s very unobvious with some manufacturers moving away from the typical small, medium, large, and going with size 1, size 2, all the way to 6. Small, medium, large, sizing used to be based off seat tube lengths, so the bigger the bike, the longer/taller the seat tube. But the way we rip around on trails requires us to move the bike around more so lower seat tubes is a good thing for more dipping clearance and if we plan on pedaling we have dropper posts that will put the seat up for that. Trail bike sizing now suggests top tube length. That way if you’d normally ride a medium you could choose a bike based on how long you want it to be. Longer bike, more stable, shorter bike, easier to move around sideways.
3. Geometry. Chainstay length (some nerds call it rear-to-center) is the length from the bottom bracket to the rear hub. This influences how easy it is to shift your weight to the rear, and (combined with the bottom bracket height) how easy it is to lift the front end. It’s also easier to laterally rotate the bike, which does mean less stability. Okinawa trails generally aren’t that fast so rear end stability is not that high of a concern for most riders. Head angle you can think of as how steep the fork is. Steeper head angles basically mean faster steering (think bmx bikes). The sweet spot for a lot of trail riders in Okinawa is the extra medium 66 degrees. More stable than a XC bike, more responsive than a DH bike. Developing trails in the jungle is difficult and there’s a lot of awkward tight angles where a faster handling bike is ideal but still capable of plowing through chunky sections with surprise tree branches from last nights winds.
4. Integrations. Standards have been updated and there are some sweet advantages. The first would be the 1.5″ lower headset standard. Forks will have tapered steerer tubes which allow stronger and stiffer fork crowns. Also aiding fork stiffness are 15x110mm thru axles. These are easier to use than 9mm quick release skewers, as it’s impossible to do it wrong, and the hubs and forks are much stiffer laterally. That means the more accurate steering through rough terrain as the wheel won’t steer away from the line you’re going for. Rear ends now have 12x148mm thru axles for pretty much the same reason.
Hydraulic disc brakes
Almost every bike meant for the trails but also some fancier hybrid bikes use hydraulic brakes. The power and feel make cable-operated brakes seem silly. Sometimes it’s obvious when you need a brake bleed, like inconsistency or low pressure, especially after letting the bike sit on its side or upside down for a minute. But even when the system feels fine, the fluid could be separated from age or heat cycles, or there could be debris from the seals or hose. We recommend that bikes that haven’t had a fluid flush in two years get a full bleed. Our rentals get bled twice a year.
Tubeless tire systems
Most modern trail bike tires are designed to be ran tubeless. While you can run tubes, going tubeless gives you more traction and durability since the tires can heal themselves. But they do require a bit more love. One of the bigger things is that the tires need to spin often, meaning if you plan to let the bike sit for months at a time, the sealant can get a little funny, especially with Okinawa’s extreme summer heat. Typical sealants, depending on many variables such as oxidation, heat, and motion or lack thereof, can begin to clump up or separate after a few hot months, no longer being able to seal new punctures. Here at Cutty Jungle we switched to water and olive based Vegetalex for more consistent performance throughout the year.
We are advocates of going tubeless, but not all rims will agree. If you’d like to upgrade, talk with us!
Rims
You’ve heard of them, but we should talk about them. Most quality bikes use some sort of double walled rim. This means it’s built like your wife’s Stanley cup. For our trails, even with lighter weight riders, I do recommend beefy and wide. A lot of entry level bikes that are a couple years old come with nice but narrow rims. Narrow rims don’t take as nicely to wider tires. For taking on our wilder trails, high volume 2.3″ wide tires are kind of the minimum for what I’d recommend. While you may still be able to set these up on 20mm wide tires, they will make it known to you that they aren’t happy. They’ll be harder to set and will have a high and potentially dangerous tendency to roll off the rim laterally. I’d go for 25-27mm internal width rims as a minimum for modern trail tires and hardcore riding.
Tires
Also a big deal. You want nice ones, it matters! There’s a lot of nice ones that would do well here. For our wildest trails, especially in wet summers, we recommend 2.3″ trail tires, though there’s nothing wrong with going fatter as long as your rims will support it. Most of our riding doesn’t actually have aggressive fast corners. Big knobbed tires that brake well and are predictable at any angle do best here. Tires with huge transition gaps, like the Maxxis DHF, are good, but that knob gap could get weird in fast loose but flat turns on dirt roads. Our favorite tire is the IRC Tanken. The standard compound is very capable here and hasn’t given anyone issues or made them wish for stickier rubber. That said I do run the Gekkota compound (ultra soft) on the front of some of the rentals for extra traction.
Suspension components
Suspension is a magical thing, but like everything worth your love, it requires care, which we provide. While they range in complexity and tuneability, for the most part they depend on the ability to smoothly pump in and out of itself like a shy turtle. Most manufacturers have a specified 50hr service interval where the slider part is removed and related parts are inspected, cleaned, lubed, or replaced. This ensures that smooth in and out action. We take on this service for most suspension components and work with distributors for Rock Shox and Fox, though we can, or you can if you prefer, obtain kits for other brands.
We also take on most fork 200hr services as well as specified work such as damper components. For shocks, we mostly do 50hr service since we do not currently possess the specialized instruments to take on total shock rebuilds.
Dropper posts
These are the butt and button activated seat posts (with the seat on, hopefully) that go up and down. There’s a few different technologies and concepts on how these things are built and operate, but like everything in life, there are some patterns. And for the most part, they all need some care or will start to operate weird. Similar to suspension work, the slidey part requires attention. But how these come apart varies greatly, as well as the durability of the components used. Let us know what kind you have and what issues you’re having.
Shimano clutched derailleurs
This is the technology in the rear derailleur that allows for proper chain retention at the rear end of 1x drivetrains. They work by adding spring tension to the cage to reduce how much it flops fore and aft so that the chain doesn’t flail around like when you surprise a keelback snake on the trail. We happily take on servicing these mechanisms, though their rate of degradation varies greatly and the hardware is delicate, so we normally advice servicing only when performance has notably diminished.
Sealed bearings
Not really MTB specific, but you will see them a lot on MTB full suspension frames. Most modern hubs also use them. Traditional adjustable open bearings can be disassembled, cleaned, and relubed, but also sometimes everything is all pitted and trash. Cartridge sealed bearings solve that by being a separate sealed thing that gets pressed into the main component. When serviced, we typically expose, clean, inspect, regrease, then properly rebuild. If they’re bad we’ll replace them. This is valuable work because dirt sitting on the shields will figure out a way to get in or start causing damage to other contact areas. The dirt also holds onto salty Okinawan moisture allowing oxidation to happen and you get the worst kind of grittiness.
Two-piece cranks
Also not MTB specific, but most trail capable bikes will be at a pretty good level of technology. The drive-side crank arm will have a large spindle that gets shoved through the bottom bracket, which is also a wildly diverse world. The non-drive side crankarm pinches onto that fat spindle. Or something like that. There’s a few technologies. For the most part, when serviced, we uninstall, clean, lube, proper reinstallation.
Pedals
Not super intricate as a technology, but thought I’d add it since so many riders blast down the trail with their seats up their butt and their feet no where near the pedals. Get good pedals! Like brakes and tires, it’s a safety and performance component. Ideally what you want out of a reliable flat pedal is a slim box with metal bolts as pins. They can be plastic or aluminum, that part doesn’t matter as much as the pins.
Seats
The bike seat you imagine when you think of bike seats is generally what you want. Simple and sleek may not look like what you want to sit on, but don’t really think about that too much. The idea is something you could maneuver around for super dynamic mountain biker moves, and also not terrible to sit on for a few minutes at a time. That said, there’s a billion shapes that kind of are like that. Also how you position the seat has some effects too. How you ride also changes how you feel about a seat.
Less than Ideal tech for Oki trails:
And here’s some tech that may be on your bike and probably ok, especially for easier routes, but not the most appropriate for the wilder stuff.
Basic or XC frames
XC frames are basically lighter and lighter duty frames designed with consideration for sprinting and endurance. They generally have snappier acceleration and steering response due to how they are built and their geometry. They’re very fun for less rough terrain. On some routes, their efficiency and fun make them ideal. There exists frames that are not really XC frames, but rather just durable workhorse frames such as the Specialized Rockhopper that have similar head angles to XC bikes, maybe slightly longer chain stays for more rear end stability, and these are capable of riding pretty much anything, they just won’t be the that stable or precise in wilder conditions.
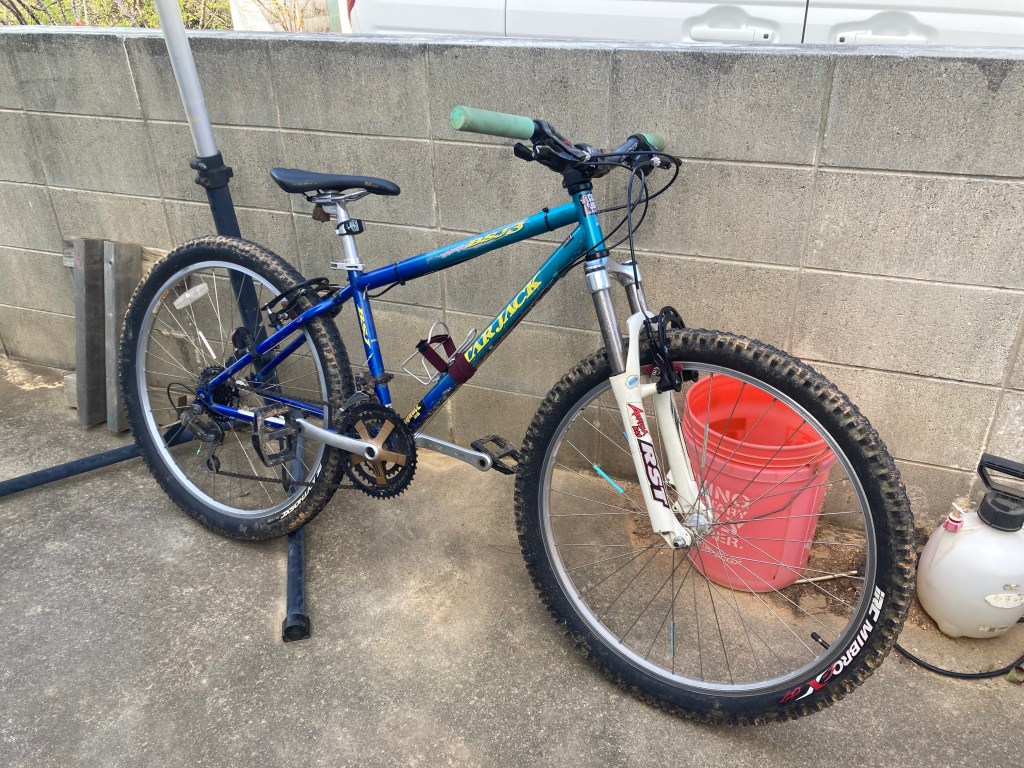
V-brakes
Actually not that bad and pretty good for less aggressive trails. My vintage mtb uses them and I prefer that bike for the XC Loop and also for urban mixed terrain tours. Set-up is very important! Ideally you’d want to be able to control the full range of braking power with just one finger. The performance of these brakes depends on many variables. Frame and fork flex is a big killer. Brake boosters that bridge the mounts and increase stiffness help a lot. But probably the biggest issue is installation and upkeep. Cables getting crusty, pads angled weird or not hitting the rim properly destroy braking potential. Pads and rim surface could also be variables.
Mechanical disc brakes
Similar to V-brakes, these are cable actuated and rely on perfect setup. Though they seem simple, there’s a lot of variables in performance when it comes to caliper design. Most have a static pad holder and one moving piston. And this is where the design matters. Some use tiny pads and super low powered. A lot of OEM type calipers have flexy parts that loose pressure from the cable pull. A lot of bikes have less than ideal cable routes that also add drag so at the lever there’s a ton of mush and often a very heavy pull. High performance cable housing can make a big difference here. While you do get the benefit of better wet weather performance over rim brakes, most setups will have less raw power and modulation than a really good v-brake set-up. You also get the added complication of maintaining a rotored setup: avoiding contamination and proper burning-in.
Front derailers
More of a complication than anything. They do usually imply an unclutched rear derailleur but that’s not always true. In that case, you do have a floppy rear derailleur cage that can throw the chain off the chainrings. You do get the benefit of increased gear range, but for most, messing with a front shifter is not cool. Also if you want to run a dropper post, the lever will want to be where the front shifter is.
Suntour coil forks
There are other forks that fit this category. That category being simple, undamped, coil forks that can survive a few rides. These heavy forks sometimes even have a lock-out setting. They can feel smooth, if you’ve never experienced a better fork, but they essentially use pogo stick technology. They actually don’t use bath oil, making them less advanced than $20 RC car coil-overs, but every time I take them apart they’re full of rusty greasy fluid. There’s no crush washer at the bottom holding the “damper” shafts, so that water does sometimes leak out and contaminate disc brakes. These forks can work ok on the trails. The biggest issue in terms of ride quality is not the lack of adjustability for rider weights, but the lack of dampening. These forks absorb shocks but do not aid in the bike in maintaining traction and control. Also the bushings fail often so a lot of heavily used ones will have play between the stanchions and wipers.
Low-end tires
Most entry level bikes will come with hard 30tpi low profile tires that are great for riding around town, but don’t offer a lot of grip in the dirt. Most will also be in the 1.9-2.1″ range. They’ll be ok on the dirt roads, but can get sketchy even on the fenceline trails on the XC Loop.
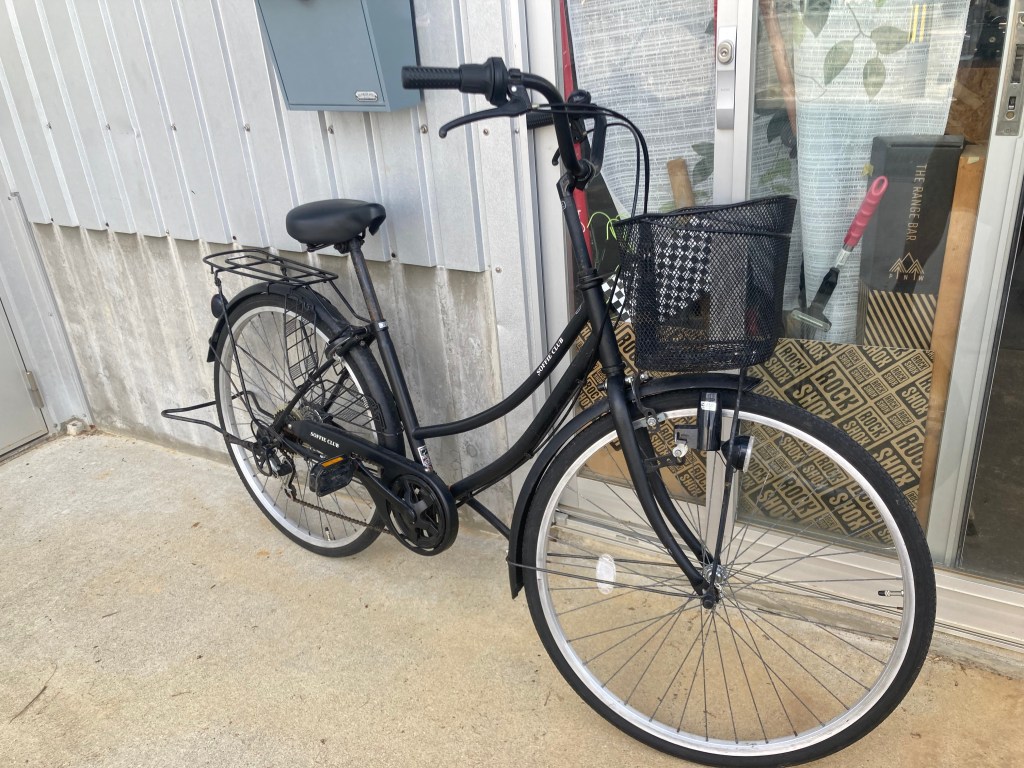
MTB shaped bikes and what’s going on there:
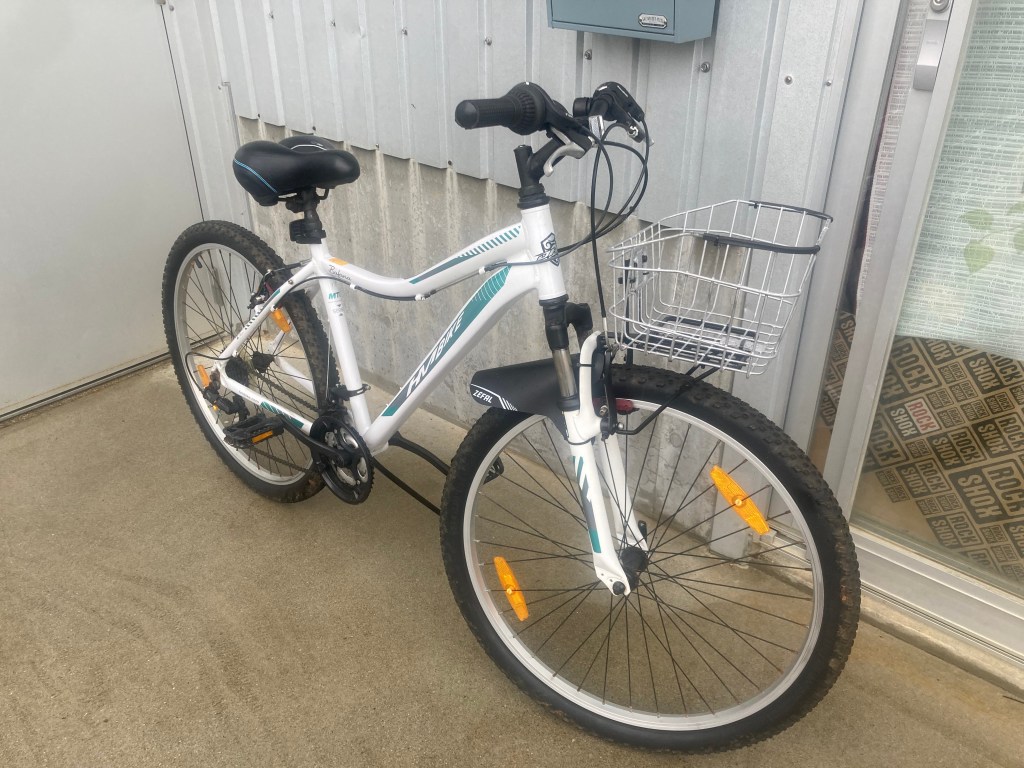
Some bikes kind of look like mountain bikes, but were not ever really meant to ride on trails. In fact, there’s probably a sticker on it somewhere telling you not to. The one I pictured above actually isn’t that bad. It could cruise around on the dirt roads and do the paved scenic rides on it without much issue. It even has an aluminum frame so isn’t that heavy! Where it will have a hard time is maintaining control. Let’s go over why.
Braking
While v-brakes mostly provide adequate power, these generic ones are a little on the mushy side. The cable housing has very little support and the long levers are also very flexy. But it is better than some other bikes I’ve tuned.
Tires
Low profile and hard rubber, these tires roll, but not much else. It is easy part to upgrade though.
Fork
This fork likely uses similar tech to a coil Suntour fork, but with rougher build and heavier, yet softer materials. The lowers are steel rather than magnesium, the stanchions are super narrow, offering very little support. The fork is overall very flexy in every direction, but actually almost feels damped! So it is pretty comfortable on the dirt roads at low speeds. It likely wouldn’t survive a spirited trail ride.
Drivetrain
This one actually uses Shimano, but absolute bottom-tier. It’s reliable within reason. Precision is not much, but it will function even when the derailleur is slightly off or cable tensions are wrong. But it will be extra flimsy and throwing the chain all over the place.
Stem and handlebar
This bike has what is known as a “quill” stem. Rather than clamping onto the forks steerer tube, this one jams into it and uses a wedge to hold its position. It works. It is heavy and less secure though. The handlebar is also narrow and heavy steel. It’s angles are more for comfort than control.
That seat
Comfort is a subjective thing. Objectively, I can tell you a water balloon is not the ideal trail seat. Cushioning is nice for when you just want to sit and putt putt around, but you’ll be limited to that sort of riding if it’s difficult to work your way around a bulky seat. Also, this particular one has this slit hole thing that kind of mouths you. Not ideal for trail performance.
Frame
This is a big one. While it is aluminum and fairly light, it’s intended design purpose is to sell a buttload of to nice people that just want to cruise around with their family at the park. It’s nice for that, might even be the best bike for that. The frame is soft and comfortble, but will ride like a noodle when pushed. More importantly, it’s not meant to last long in rough conditions and will likely even suffer damage such as warping or stress fractures from hard use without even crashing.
Not a MTB at all:

enter: the mamachari.
These contraptions are everywhere in Okinawa. Specifically, being ridden on sidewalks and can be found thrown into bushes and the ocean. They aren’t really built well enough to survive riding on the actual street. The only time they go fast is when the rider is trying to slow down descending a hill. The brakes are garbage and, concerningly, the electric versions of these things use the same wacky brakes. The sad thing is there’s actually bikes categoriezed as mountain bikes that are basically these with more normal looking handlebar and frame. They come together with less tools than Ikea furtiture. Typically you just need a phillips screwdriver and an adjustable wrench. Let’s dive into the tech!
the frame
Usually heavy tube steel with no butting. The bikes are super soft and its actually part of its tech because to remove parts for service usually involves bending stuff out of the way. The frame and fork will not have mounts for any kind of braking system.
Brakes
The rear is typically a band brake which kind of has the utility of a drum brake. It has zero response speed, sometimes develops a crazy loud squeal, and theoretically functional in the rain. The front is a very flimsy side pull caliper.
Dunlop (English) valved tubes
Assuming you already wrestled the wheel off of the mamachari, after fighting through the brake, the extremely complex kickstand, the fender struts, the derailleur guard, and the derailleur itself because the hub’s super long axle does not clear and you have to bend the rear triangle open to remove it, you must first remove the gnarled barrel nut, valve core, and the stem nut, get the tire off remove the new tube’s valve parts, put the valve back in and partially thread on the gnarled nut, partially inflate, get the valve into the rim, remove the gnarled nut but make sure the valve core stays in, thread on the valve stem nut, reinstall the gnarled barrel nut, set the tube into the tire completely, secure the tire onto the rim, inflate the tire all the way, which you go by feel since pressure gauges don’t work with these valves, pull apart that rear triangle again to fight the rear derailleur to get the ridiculous axle into the horizontal dropout, place the kickstand, place the derailleur guard, place the fender struts, secure the band brake mount to the metal band on the non-drive-side chain stay, get the washers and nuts on, line up the wheel by eye, tighten the nuts, go back to the brake where you need to get the brake cable through a spring thing and into the anchor bolt, secure the anchor bolt nut, crimp on a new cable end, then throw the bike into the ocean.